It separates the updates that require you to restart your computer so that they are easier to distinguish. You can download Snappy Driver Installer from here. Windows Services also know as services. These services are responsible for running available programs and managing many system settings and resources. You can modify a service's settings for security, troubleshooting, and performance-related reasons.
Windows Audio service manages audio for Windows-based programs. If this service is stopped, audio devices and effects will not function properly. If it is disabled, any services that depend on it will fail to start. Once it is open, type "services. In the Services window, you will see a list of Windows services. Find "Windows Audio" service and right-click it. Select "Restart" from the contextual menu.
About This Article
Alternatively, you can select "Stop" and then right-click it again and select "Start". Check if this solves the microphone problem. If that does not work, right-click the "Windows Audio" service and select "Properties" from the contextual menu. In the Windows Audio service properties window, check if the "Startup type" is set to "Automatic". If not, set it to Automatic and click "Apply" to save the changes. Restart the computer and see if this solves the problem.
Webex microphone not working with MacOS - Cisco Community
The System Restore tool creates restore points. A restore point is a collection of important system files stored by System Restore on a given date and time. System Restore reverts everything to a saved restore point, but first, you must have one recorded. If a restore point does not exist on your computer, System Restore has nothing to revert to. To use this tool, you must have created restore points. With a created restore point, this feature will bring your system back to the previous working state, without affecting your files and data.
Apply this method only if your microphone stopped working recently. For example, if this problem occurred after you updated Windows.
If you have any system restore points that were created before you started experiencing issues with the microphone, you might be able to fix the problem by performing a System Restore. In the Run dialog box, press Enter or click "OK". If there are restore points created, you will see a list of them. Mark the "Show more restore points" checkbox. This should display more restore points.
"Unable to access microphone, please check system settings."
Select the most appropriate restore point depending on the time created, etc. Do not select a Restore Point at a time when the problems with your microphone were already present - you certainly do not want to revert to that state. Confirm the restore point. Your computer will be restored to the state prior to the event detailed in the "Description" field. If you are happy with your choice, click "Finish" and the system restore process will begin.
- Footer Resource links.
- flip for mac pro hd.
- How to Activate a Microphone on Mac.
- polytrans for mac os x.
- rebecca minkoff mini mac bright blue.
- macOS Mojave: stopping apps from accessing your Mac's mic & camera.
We hope that this guide was helpful and you are able to solve the problem with your microphone. I went everywhere, all discord helps sites, tens of reddit posts and some dodgy helper sites that just tell you to reset your voice settings in discord. December 18, 21 Minutes By Jake Kovoor.
Logging Out and Restarting Discord. Try unplugging and plugging back in. You can also try to plug in using different ports. Make sure to check that your microphone hardware does not mute when connected with your device. If you do not have any headphones lying around try to ask your friends or your family to borrow theirs. Try Pushing to Talk. Call the Discorders. Related Posts. If you'd like to use an external microphone, connect it to your Mac via a USB port, an audio line-in port, or Bluetooth. Most Macs, including all laptops, have a built-in microphone, but an external microphone typically affords better sound quality.
Different Macs have different port configurations: Not all Macs have a line-in port, and some models of MacBook have a single audio port that can be used as both audio line-in and line-out. Check the sides and back of your Mac to determine what ports are available. It's in the upper-left corner of the screen.
Tightening up security & privacy
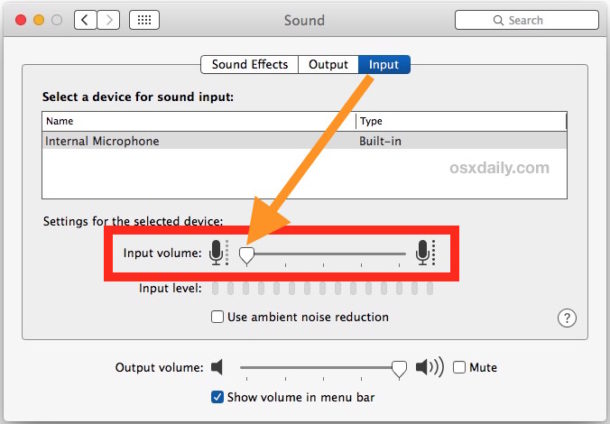
It's near the top of the drop-down menu. It's in the right-center of the window. It's a tab at the top of the window. All available microphones and audio input devices will be listed in the menu near the top of the window. Click on the one you'd like to use. If your Mac is equipped with a built-in mic, it will be listed as "Internal microphone".
If you don't see your external microphone on the menu, check it's connection. Adjust the settings for the selected microphone. Use the controls in the bottom half of the window to do so. Move the slider for "Input volume" to the right to make the microphone more sensitive to sound. Test the sound level. Speak into the microphone to see if the sound registers in the meter marked "Input level.